Tuesday, December 19, 2017

who wants a do it all boom box with a Ford logo?


This is so retro cool - who wants to buy me one?


it's badass!

  • 8-inch woofer, 3-inch tweeter, and 100-watt peak power amplifier pumps up the volume - great for outdoor adventure!
  • IPX4 water-resistant - okay to leave in the rain
  • "All-terrain tire" rubber-treaded body and 75-hour rechargeable battery for uninterrupted fun from a durable speaker
  • Telescoping handle, wheels, and two side carrying handles give you all you need for portability
  • Includes 12V input jacks and cable to keep your speaker working while you're on the go


Wednesday, November 29, 2017

Installation of the Ford Raptor Lights Kit - you can do it!

From a previous post, I jumped on the Black Friday deal at http://fordraptorlights.com and had a custom setup delivered.  https://2017-ford-raptor.blogspot.com/2017/11/gonna-lite-up-nite-with.html

When the kit arrived, I was super excited.

I've never owned a truck, and I've never wired up lights before - but the new Ford Raptor makes it REALLY easy with the AUX switches that are built into the ceiling console.  For some, this is a trivial install - but it's fun to try something NEW!   Here's the process and steps I took to install...

Custom Triple Bezel Kit Full With Wire Harness Brackets 
KC HiLiTES Flex Lights and all hardware × 1
KC HiLiTES FLEX amber covers × 1
BAJA SQUADRON SPORT DRIVING COMBO PAIR
BAJA SQUADRON PRO SPOT PAIR


Unboxed everything, all in great shape!  Seriously good quality in this build - the frames are SOLID and each piece fits together perfectly!

Here's a closer look at one of the frames with the KC HiLites 10W LED and amber cover.

 One of the amber covers installed, and the other shown - they come with a protective layer on the backside to ensure they're not scratched up - very nice!

Both lights with lenses mounted - this will give a wider spread pattern for fog/snow/rain.

2nd slot gets BAJA DESIGNS SQUADRON SPORT DRIVING COMBO PAIR
notice the bottom 2 lenses are fluted to distribute the light path to the sides, and the top are more of a spot (long throw) pattern...


CENTER slot gets the super powerful BAJA DESIGNS SQUADRON PRO SPOT PAIR, these lights are 4300 lumens which is VERY bright and are long throw for distance

I started to lay out the parts to ensure they're in the right locations, the plastic triangle parts clip into the metal brackets and the KC Hi-Lites fit only in the outer most slots, the BD lights fit into the 2 central slots for the brackets.

 Here's a better picture of the brackets with the plastic clipped into the shell...

 Since the lights are different sizes, they have to be mounted at different heights - the kit comes with washer and spacers to allow for this height adjustment - you can see the collection of washers, risers, lock nuts per light...  pretty simple once you figure it out, and it's all documented in the guide!


A closer view of the driver's side setup - the black bolt shows where the light bracket will reside.

I was excited to see how it all went together so I mounted all the lights...

yes, both sides...

Prior to installing the brackets the kit comes with some nice gaskets that fit the Raptor opening perfectly.  Start at the bottom, trust me it's much easier than any other option.

Fits perfectly - as I stated before - this is a GREAT kit!

When you mount the brackets on the Raptor - there's already 1 hole under the bumper cover brace, the bracket goes in FRONT of the brace and you thread THROUGH that hole into the bracket.  The 2nd hole isn't threaded either but you just turn the screw through the plastic till it catches the bracket.  This was probably the toughest part...

 So - here's the driver's side bracket mounted... notice the BD lights are missing... yeah, after a few phone calls with the Ford Raptor Lights team (THEY'RE AWESOME!) they said it's much easier to mount without lights installed - and they're RIGHT!  

Here are both brackets installed with all lights mounted

Driver's side closeup... 

This was something that I was a bit hesitant on... the kit comes with a pre-wired loom with all the same connectors that fit the KC Hi-Lites but the BD lights need a Weather Tech connector - so you have to cut the end and wire in new connectors.  I'm not new to stripping/crimping but it was one of those unexpected things to do... I sat and watched some Netflix and did the 4 new ends LOL


So the wire loom was completed, and the lights were mounted I just needed to wire these puppies up!
I chose to setup the first 3 of the 6 AUX lights


AUX 1: KC HiLiTES Amber Flex Lights
AUX 2: BAJA DESIGNS SQUADRON SPORT DRIVING COMBO PAIR
AUX 3: BAJA DESIGNS SQUADRON PRO SPOT PAIR

The reason I did this instead of just wiring all of them to 1 switch is that I can customize what light is needed.  If i just need the amber fogs, AUX1. If I need more light for dark roads flip AUX2.  For long shot visibility, flip on AUX3.  All 3 on for BAM! Visibility! :)

I first routed the wire loom to each set of lights and then up the passenger side of the engine bay.  Under the hood, by the passenger side rear of the engine bay there will be 6 wires tucked away - these are the AUX upfitter wires.

SwitchCircuitWire Color
Aux 1CBB47AGreen/Blue
Aux 2CBB48AGray/Yellow
Aux 3CBB94Violet/Orange
Aux 4CBB96Brown/Blue
Aux 5CBB98AGray/Orange
Aux 6CBBA0BYellow/Violet
Here are the AUX1-3 wires connected to the wire loom.  I used some heatshrink butt connectors and added more heatshrink tubing over those to ensure everything is watertight.  

And the finished result!!!

Hope you enjoyed reading as much as I enjoyed installing - leave feedback!

Wednesday, November 22, 2017

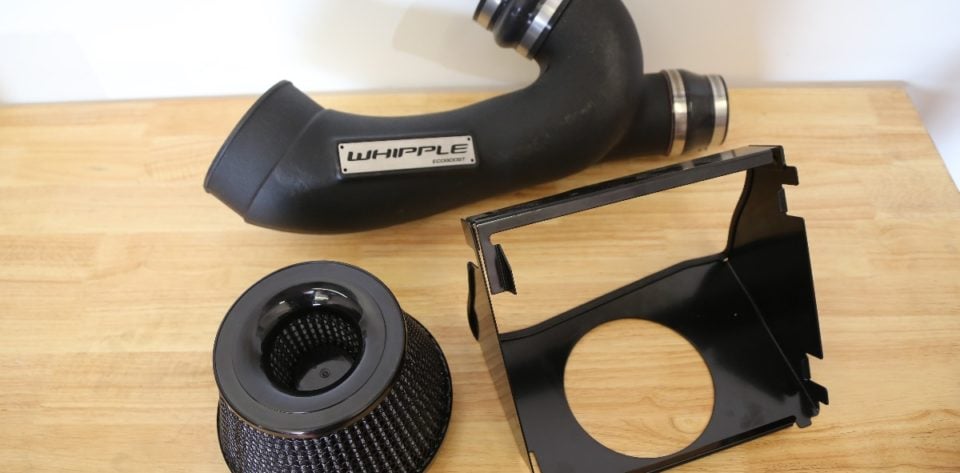
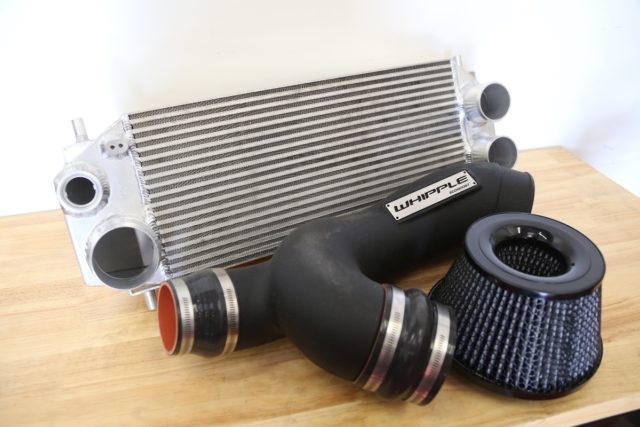
Whipple Stage 1 Kit for 2017/2018 Ford Raptor Group Buy is ON till 11/27

Whipple Stage 1 Kit for 2017/2018 Ford Raptor


CARB APPROVED!  

Group Buy will close Monday, 11/27/17 - let me know if you want in on this!  Already up to 18 interested folks who are committed to buy!
Once the group buy closes on Monday, I'll update the list to be finalized and Whipple will send out emails to contact the buyers.

Original price $1,999 includes tuner, intake, intercooler

5-9 = 15% off $1,699
10-19 = 20% off $1,599
20+ = 30% off $1,399

Here's the new programmer!  No need to ship your PCM!


Some of the basics it can do and keep in mind, its an OEM based tool so it will never have all frills some of the other tools will have.

Currently:

  • Read/erase codes
  • Upload stock file, save to SD card (can back up on PC)
  • Download modified cal
  • Tire/axle changing
  • Crank relearn
  • Data logging, 2gb SD card included
  • Read live data

Future:

  • Cals comes from Whipple server
  • Whipple server notifies you if an update becomes available
  • More advanced logging and graphing features.

Whipple, known for its industry leading upgrade systems and technological innovations, has now brought the same technology to the 2017 and up 3.5L V6 F150 and Raptors with the Whipple Stage 1 system.

The stage 1 systems couples the Whipple Mega Cooler, roto molded high velocity cold air intake and industry leading custom calibration to make an amazing 150* foot pounds of torque and 70* horsepower more than stock. Even better, at 3500 rpm, the system produces over 180 foot pounds of torque over stock giving more power under the curve for incredible throttle response.

The Whipple Monster Cooler offers 54% greater volume and 8% more surface area. The bar and plate type intercooler features offset fin on both the cold and hot side, allowing for increased cooling capacity while fitting into the stock packaging, yet significantly out performing the stock cooler. Test show a 90 degree (F) drop in temperature just on the dyno, yet even bigger gains are shown during real world applications. The colder air allows increased spark advance and more O2 to the engine, resulting in more power while maintaining safety.

The Whipple high velocity air intake system boast the CAD driven, CFD modeled rotor molded plastic air intake that maximizes air speed while reducing inlet restrictions. The air system features the velocity stack gauze those filter with extra wide pleats, giving the air filter the capacity to flow over 132% more air than a stock paper filter.


The Stage 1 system heart and soul is the industry leading calibration. Whipple and it's Ford calibration team worked feverishly using advanced tools to develop a calibration that could maximize power while being legal and safe at the same time. After countless dyno and real world testing in multiple environments, the engineers were able to extract massive levels of torque and horsepower yet maintaining factory type safety settings.

The Whipple Stage 1 system is the first and only 50-state legal Ecoboost complete upgrade package available today CARB APPROVED! allowing for upgrades in all 50-states. No cutting or grinding required.


Monday, November 20, 2017

Gonna lite up the nite with FordRaptorLights setup!

While the LED headlights are pretty good IMHO on the '17 Raptor I'm going to light up the night with this 6-light setup from https://fordraptorlights.com  they have an early Black Friday '17 Sale going where you get $75 off and a $50 MIR from Baja Designs!  


Here's my order - see what you think?

Custom Triple Bezel Kit Full With Wire Harness Brackets 
KC HiLiTES Flex Lights and all hardware × 1
KC HiLiTES FLEX amber covers × 1
BAJA SQUADRON SPORT DRIVING COMBO PAIR
BAJA SQUADRON PRO SPOT PAIR


I chose these three setups for brightness and distance, the outside KC Flex will have a good spread pattern with amber covers to have a wide path for fog.  The Squadron Sport will be great for daily driving - bright but not overly so.  The Squadron Pro Spot will really send the light when truly needed...  All done with the AUX switches onboard!!

KC FLEX™ Single LED feature bright CREE LEDs in a spot or spread beam pattern inside a compact, rugged Aluminum housing with precision reflectors.  Rated at 10 watts and 975 lumens in a wide spread pattern, great with amber covers to match the Raptor!

Squadron® Sport utilizes 4 Cree LEDs producing an impressive 1,800 lumens at 20 watts making it ideal for near field, side/backup and scene lighting applications.

Squadron® Pro packs 4,900 Lumens at 40 watts that will truly annihilate the night. Don’t let this light fool you, although compact in size this LED auxiliary light will literally blind you with brightness.  The Pro comes equipped with a sleek black gloss aluminum housing and outshines the competition through both appearance and performance.

Use code 75BUCKS to get the initial discount!


Super Excited for the holidays!  Gotta find some DARK places to visit :)


Friday, November 17, 2017

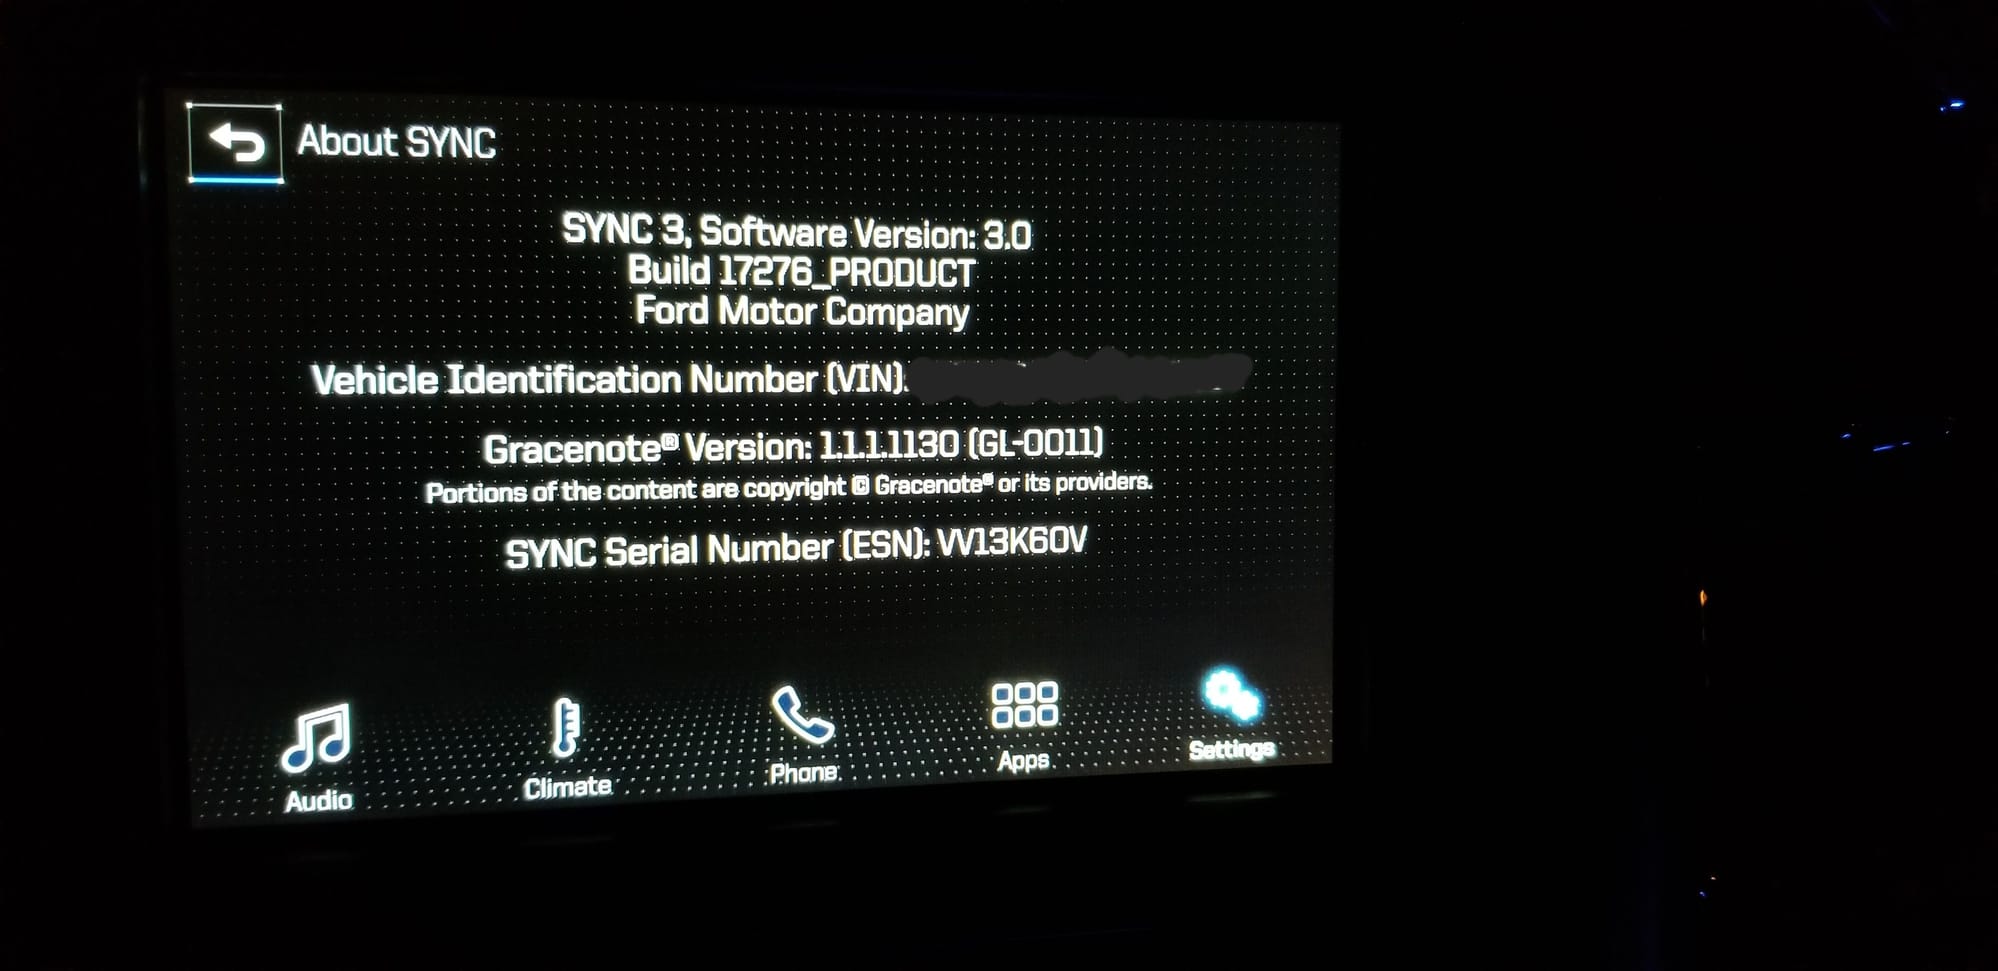
SYNC 3 "UNOFFICIAL" V3.0 BUILD_17276 is AVAILABLE!

If you liked my last thread on Ford SYNC 3 Version 3.0 - this is even better!  A new build!

Mirror: Here

Non-Nav Version 
Mirror: Here 

(Follow official pdf instructions below) Installation instructions: 
1. Download. 
2. Unzip onto desktop. 
3. Grab a USB Flash Drive, 32GB minimum

4. Format the drive to exFAT.

5. Put the extracted files inside the flash drive. 
6. Turn car on. Turn bluetooth off, just in case(optional). Or master reset before beginning.
7. It might take 5 mins for Updating System Software message to pop up, then 19 mins to install from there on

Depending on the Ford model, it might reboot automatically after installation is complete, if navigation maps don't come back don't worry turn off/on the car again.

*OFFICIAL UPDATE v2.3.10 --> OWNER.FORD.COM*

**CAUTION:There are FOUR versions to this update, MY 16 Nav/Non-Nav, and MY 17 Nav/Non-Nav, a single file will not work for both years! Even if they appear identical, use the one for your model year! You risk damaging APIM and/or Gracenotes and possibly other things**

***FOR INSTALLATION TO GO FLAWLESSLY THE FIRST TIME, USE MIN. 32GB USB DRIVE WITH 3.0 SPEED FOR BEST RESULTS.***


Mirror links:North America: (Follow pdf attachments at the bottom for instructions)
Official link to MY 16 w/Nav: HereOfficial link to MY 17 w/Nav: Here

USB Step 1 PDF
USB Step 2 PDF
USB Step 3 PDF

Saturday, November 11, 2017

Common Replacement and Maintenance parts for the Ford F-150 Raptor


Here's some simple stuff that I've found perusing the internet to consolidate into one simple post.  BTW if you use Ebates you get Cash Back from certain stores too!

BRAKE SYSTEM
 

SPARK & IGNITION


OIL & FILTERS


Odds-n-Ends under the hood: PCV valve, lower ball joint, Ford intercooler, serpentine tensioner


Monday, October 16, 2017

Adding visibility for lower cost...

Looking to add more visibility (other than the head-turning looks!) - there are some great options to add functionality for relatively low cost. 

I'm opting for the OPT7 model just for a bang-for-the-buck option... what's your take?


Redline OPT7 60" LED Tailgate bar is only $59
 it's weather sealed and comes with 2 year warranty...


Redline OPT7 60" Triple for $89
   

You can go a step up with Putco for $209


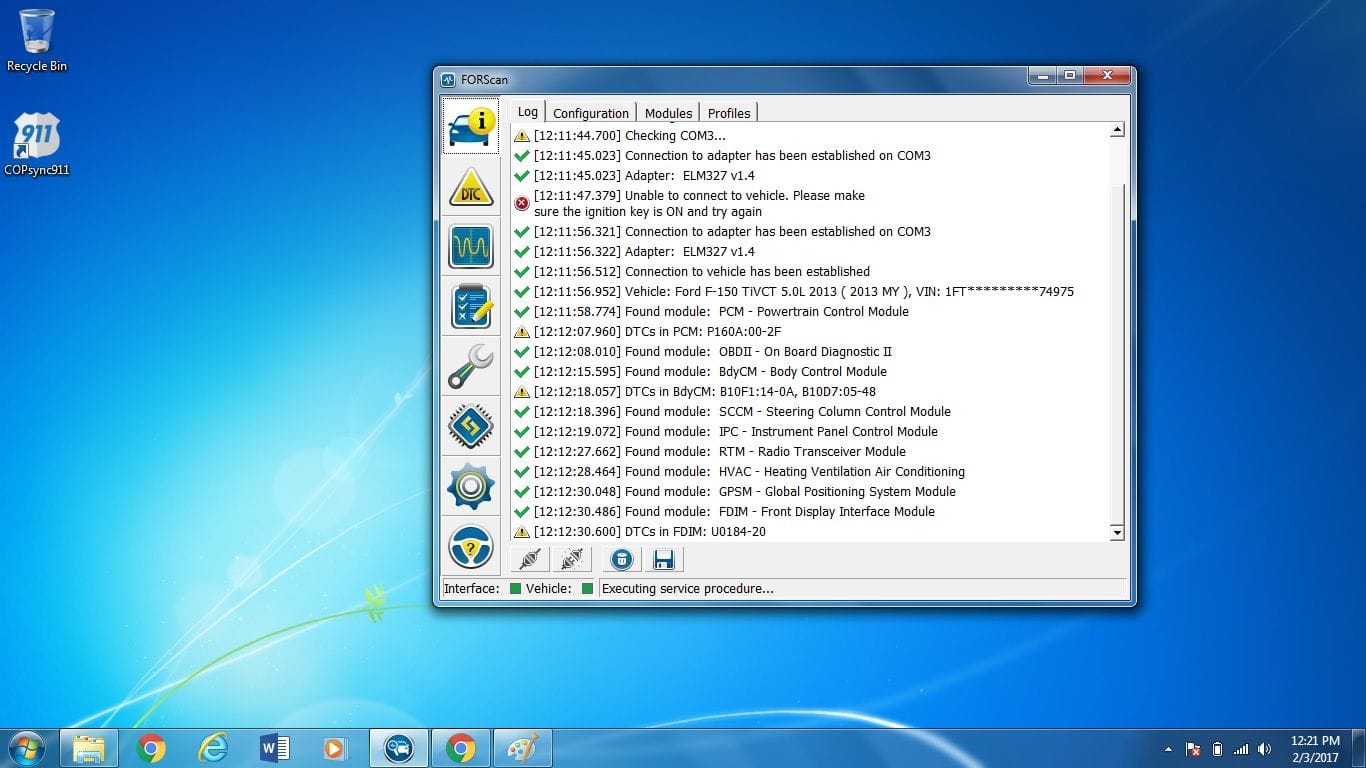
Using FORScan to tweak your ride...

After a few days of researching, I have finally figured out how to download and use Forscan for the Raptor.


Here are links that I used to install/buy/download everything you'll need. 
Do this all at your own risk. It's pretty simple, and always have a backup stock file if you start playing around.

First order your favorite OBDII adapter - these have great reviews! 


  1. Download Forscan from http://forscan.org/download.html
  2. Download the extended license in order to use it. 

  1. You'll need to make an account on the forscan.org forum site. It takes a about 30min or so for an admin to accept you, afterwards, you're good)
  2. Watch this video to learn how to move around. 

Here's a link to all the "As-built" codes discovered so far. 
It's pretty straightforward and can be a little time consuming since when you re-code anything you have to cycle the ignition, but it's worth it.

Tuesday, September 19, 2017

USB upgrade to Sync 3 version 3.0

Well, if you're like me - you love the Ford Sync 3 interface - while it's not perfect, it's pretty darned good!  Carplay is a nice update but if you've updated to IOS 11 - you'll notice some weird things going on - but guess what!? If you don't want to wait for the WiFi update - you can install SYNC 3 Version 3.0 using a USB drive!


There are new features for CarPlay with 
  1. New Nav Icon. 
  2. Fixed keyboard
  3. added symbol $
  4. MUCH faster interface smoother, snappier
  5. Support for new apps

**disclaimer - do this at your own risk! not my fault if it goes belly up!**


Installation instructions: 1. Download. 2. Unzip. 3. Grab a USB Flash Drive, 4GB is fine. 4. Format the drive to either exFAT or FAT32. 5. Put the extracted files inside the flash drive. 6. Turn car on. 7. Plug in car and enjoy!!

***** Note that depending on your USB device it might take up to 10 minutes for the stereo to show "Updating System"... *****

The USB in the car is NOT USB 3 therefore read speed is limited, so if you don't see anything, DO NOT unplug - just wait.... 


There are two versions to update your particular SYNC 3 system

Navigation 
Non-Navigation


found this over at http://www.mustang6g.com/forums/showthread.php?t=90236&fref=gc&dti=935473876561093

Finally installed my subwoofer upgrade

 So many projects, so little time... but I've been wanting to update my subwoofer and amp for as long as I've owned the truck - it&#...