When the kit arrived, I was super excited.
I've never owned a truck, and I've never wired up lights before - but the new Ford Raptor makes it REALLY easy with the AUX switches that are built into the ceiling console. For some, this is a trivial install - but it's fun to try something NEW! Here's the process and steps I took to install...
Custom Triple Bezel Kit Full With Wire Harness Brackets
KC HiLiTES Flex Lights and all hardware × 1
KC HiLiTES FLEX amber covers × 1
BAJA SQUADRON SPORT DRIVING COMBO PAIR
BAJA SQUADRON PRO SPOT PAIR
Unboxed everything, all in great shape! Seriously good quality in this build - the frames are SOLID and each piece fits together perfectly!
Here's a closer look at one of the frames with the KC HiLites 10W LED and amber cover.
One of the amber covers installed, and the other shown - they come with a protective layer on the backside to ensure they're not scratched up - very nice!
Both lights with lenses mounted - this will give a wider spread pattern for fog/snow/rain.
2nd slot gets BAJA DESIGNS SQUADRON SPORT DRIVING COMBO PAIR
notice the bottom 2 lenses are fluted to distribute the light path to the sides, and the top are more of a spot (long throw) pattern...

CENTER slot gets the super powerful BAJA DESIGNS SQUADRON PRO SPOT PAIR, these lights are 4300 lumens which is VERY bright and are long throw for distance
I started to lay out the parts to ensure they're in the right locations, the plastic triangle parts clip into the metal brackets and the KC Hi-Lites fit only in the outer most slots, the BD lights fit into the 2 central slots for the brackets.
Here's a better picture of the brackets with the plastic clipped into the shell...
Since the lights are different sizes, they have to be mounted at different heights - the kit comes with washer and spacers to allow for this height adjustment - you can see the collection of washers, risers, lock nuts per light... pretty simple once you figure it out, and it's all documented in the guide!
A closer view of the driver's side setup - the black bolt shows where the light bracket will reside.
I was excited to see how it all went together so I mounted all the lights...
yes, both sides...
Prior to installing the brackets the kit comes with some nice gaskets that fit the Raptor opening perfectly. Start at the bottom, trust me it's much easier than any other option.
Fits perfectly - as I stated before - this is a GREAT kit!
When you mount the brackets on the Raptor - there's already 1 hole under the bumper cover brace, the bracket goes in FRONT of the brace and you thread THROUGH that hole into the bracket. The 2nd hole isn't threaded either but you just turn the screw through the plastic till it catches the bracket. This was probably the toughest part...
So - here's the driver's side bracket mounted... notice the BD lights are missing... yeah, after a few phone calls with the Ford Raptor Lights team (THEY'RE AWESOME!) they said it's much easier to mount without lights installed - and they're RIGHT!
Here are both brackets installed with all lights mounted
Driver's side closeup...
This was something that I was a bit hesitant on... the kit comes with a pre-wired loom with all the same connectors that fit the KC Hi-Lites but the BD lights need a Weather Tech connector - so you have to cut the end and wire in new connectors. I'm not new to stripping/crimping but it was one of those unexpected things to do... I sat and watched some Netflix and did the 4 new ends LOL
So the wire loom was completed, and the lights were mounted I just needed to wire these puppies up!
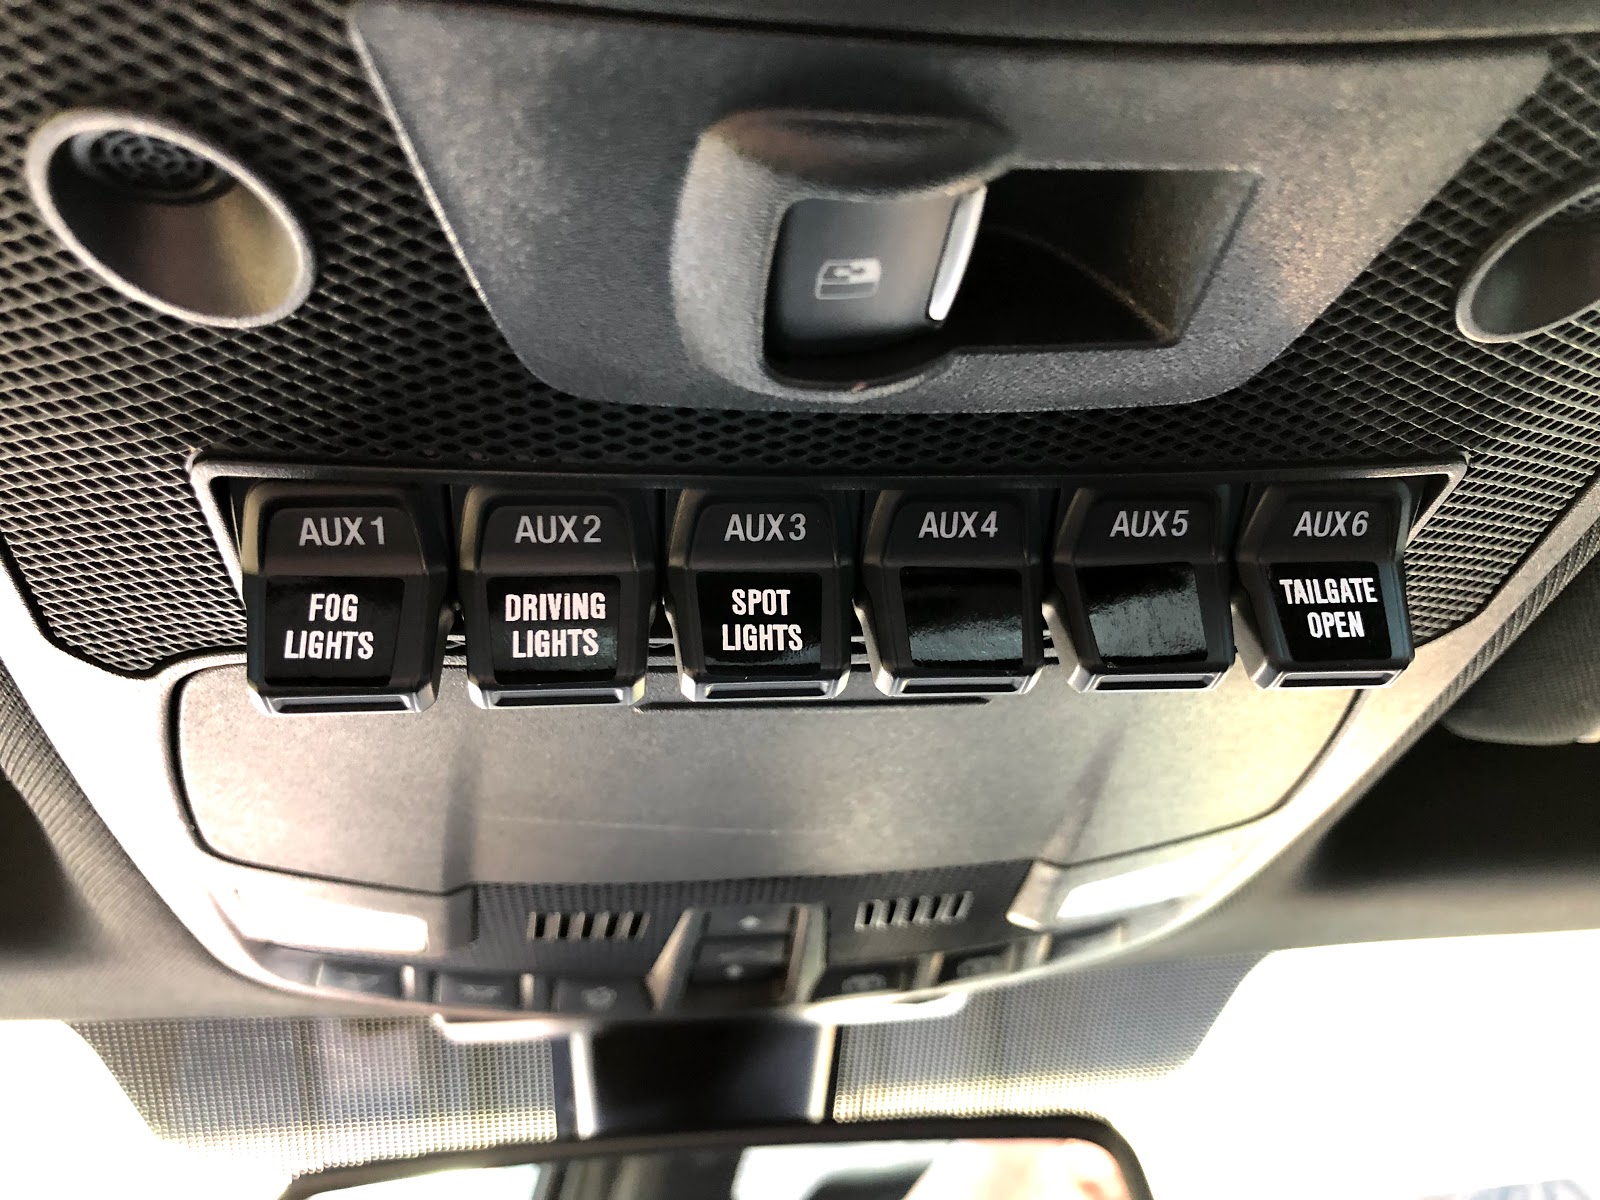
I chose to setup the first 3 of the 6 AUX lights
AUX 1: KC HiLiTES Amber Flex Lights
AUX 2: BAJA DESIGNS SQUADRON SPORT DRIVING COMBO PAIR
AUX 3: BAJA DESIGNS SQUADRON PRO SPOT PAIR
The reason I did this instead of just wiring all of them to 1 switch is that I can customize what light is needed. If i just need the amber fogs, AUX1. If I need more light for dark roads flip AUX2. For long shot visibility, flip on AUX3. All 3 on for BAM! Visibility! :)
I first routed the wire loom to each set of lights and then up the passenger side of the engine bay. Under the hood, by the passenger side rear of the engine bay there will be 6 wires tucked away - these are the AUX upfitter wires.
| Switch | Circuit | Wire Color |
|---|
| Aux 1 | CBB47A | Green/Blue |
| Aux 2 | CBB48A | Gray/Yellow |
| Aux 3 | CBB94 | Violet/Orange |
| Aux 4 | CBB96 | Brown/Blue |
| Aux 5 | CBB98A | Gray/Orange |
| Aux 6 | CBBA0B | Yellow/Violet |
Here are the AUX1-3 wires connected to the wire loom. I used some heatshrink butt connectors and added more heatshrink tubing over those to ensure everything is watertight.

And the finished result!!!
Hope you enjoyed reading as much as I enjoyed installing - leave feedback!